Speaking of iPhone backup or transfer, naturally many iPhone users may think of iTunes. Admittedly iTunes is the most comprehensive data backup and restore solution for iOS devices, but it is not the most user-friendly or easy iPhone backup and transfer solution. Apple put too many features into iTunes, but none of them worked very well. A lot of iPhone users do not like iTunes because it simply backups everything and restore everything in a batch mode. What’s more, iTunes that was discontinued on the Mac years ago, although it is still available on Windows Store but has not been updated for many years. When Apple is giving up on this software, what reason do we have to stick with it. Today, we will demonstrate how to transfer voice memos from iPhone to a Windows computer without iTunes or any other third-party software. See how it can be done in easy steps below.
Contents
- Step 1. setup file sharing SMB server on computer;
- Step 2. Connect to Windows SMB server using Files app on iPhone;
- Step 3. Export voice memos and recordings to Windows PC.
Step 1. Setup file sharing on Windows PC
In Windows system, you can turn on file sharing, also known as SMB (Server Message Block), to share files and folders with yourself or other people in the same network. You can follow these quick steps to enable Network Discovery and file sharing on Windows 11 PC.
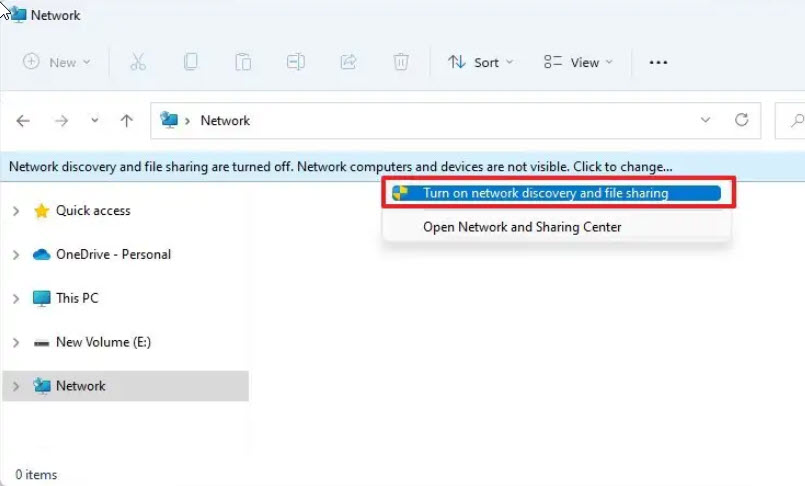
Then open the File Explorer to create and share a folder on the Windows PC. To share a folder over a network in File Explorer in Windows 11, right-click a folder, and then select Show more options > Give access to > Specific people. Select a user on the network to share the folder with, or select Everyone to give all network users access to the folder. Make sure that Everyone is granted with “Read” and “Change” permissions.
Step 2. Connect to Windows shared folder from iPhone
On iPhone, we no longer need a third-party file explorer app that supports SMB connections since the stock Files app from Apple can connect to SMB servers.
Make sure your iPhone and Windows PC are connected to the same Wi-Fi network.
On your iPhone, open the Files app. Tap the Browse tab at the bottom of the screen. Tap the More menu(three dots inside a circle) at the top right corner, then select Connect to Server from the drop-down menu.
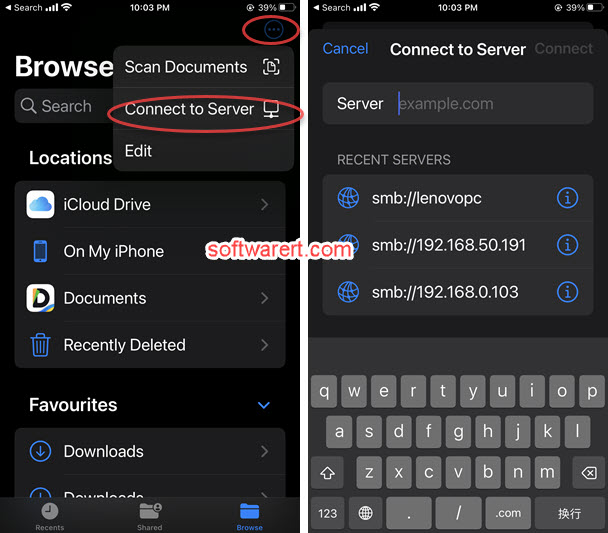
Enter the local IP address or name of your Windows PC in the Server field, preceded by “smb://” (e.g., smb://192.168.1.100, smb://windows-pc).
Tap Connect > Registered User and enter your Windows username and password. Tap Next. If the connection between iPhone and SMB share is successful, you should see the shared folder from your Windows PC appear in the Files app.
Step 3. Transfer Voice Memos from iPhone to computer
You can share voice memos from your iPhone in a few simple steps. Open the Voice Memos app on your iPhone. You will see a list of all recordings. Tap on the Edit button at the top right corner, then select the voice memos or recordings you like to share. Tap on the Share icon (the square with an upward-pointing arrow) in the lower-left corner of the screen.
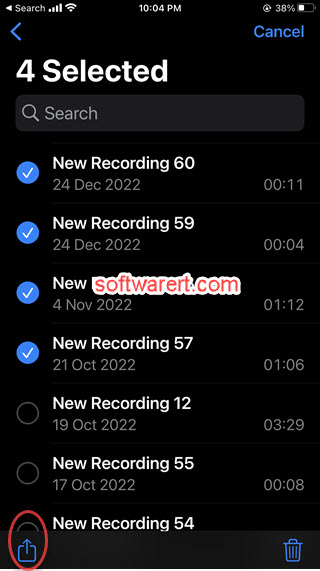
You will be presented with various options for sharing the voice memo. For example, you can share it via iMessage, email, AirDrop, or any other app that supports sharing. Here we choose Save to Files, navigate to Shared, then the shared folder on your Windows computer. Finally tap on the Save button at the top right corner to copy those selected voice memos and sound recordings from iPhone to the connected SMB server on Windows PC. In this way, the Files app acts as the the SMB client to establish connection and share files between the iPhone and Windows computer.
Go to your computer, open File Explorer to find the exported voice memos in the shared folder.