With Remotix on your Mac, you have different options to connect to remote machine. You can install Remotix Agent or Remotix Quick Connect on the other computer. The download links can be found from previous linked page. If both computers are connected to the same network and the computer to be connected is a Mac, you have another option, Screen Sharing in OS X. Mac users don’t have to install VNC server in order to use Remotix. The built-in Screen Sharing technology is based on VNC and provides an advanced desktop sharing experience. It provides us the easiest way to establish a VNC connection.
Note that, if you need to access another Mac through internet, you may use Remotix Agent instead. If your coworker or friend needs help only for once, Remotix Quick Connect might come the best decision. This is a tiny portable application with zero configuration. Run it on Mac to get the Computer ID and Access Code. Ask your coworker or friend to send this information, then open Quick Connect pane in Remotix on your Mac and enter these Computer ID and Access Code to connect to their Mac remotely.
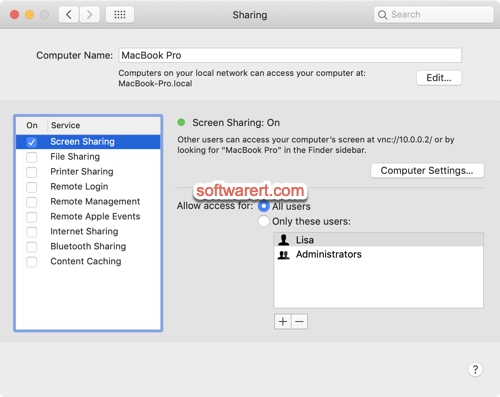
To connect two Mac machines in the local network using Remotix, you just need to enable screen sharing on the Mac to be controlled. From the top menu bar, click the Apple menu, select System Preferences from the drop-down menu, and then click Sharing > Screen Sharing.
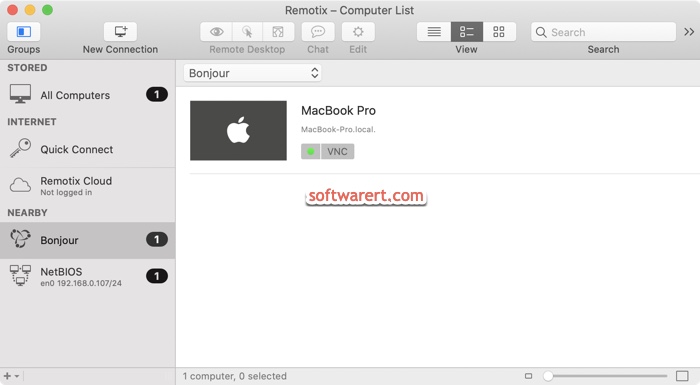
On the other Mac, run Remotix, go to NEARBY > Bonjour at its side panel, click the Mac, then enter its username and password for authentication. After that you will be able to connect and gain control.