To share large files from Mac to Windows or the other way around is to enable File Sharing and setup SMB server on Mac, then connect your Windows PC to Mac SMB server to copy files from one computer to the other.
Enable file sharing & SMB on Mac
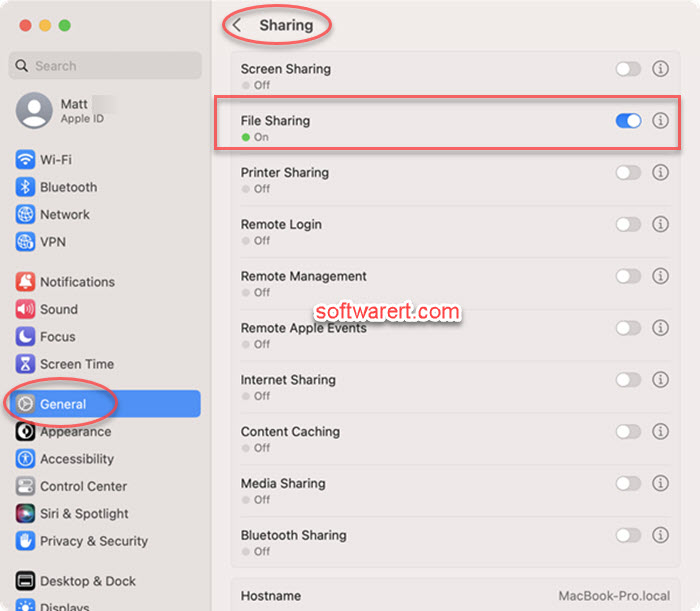
Click Apple menu, choose System Settings. Then click General in the sidebar, click Sharing on the right. Click the On/Off toggle besides File Sharing to turn it on.
Method 1. Access Mac File Share from Windows Run
To connect to the Mac File Share from a Windows 11 or 10 PC, right click the Windows menu at the bottom left corner, select Run from the pop-up menu, or simply press the Windows + R key combination on your keyboard to open the Run window.
Type the IP address of the Mac in the Run box in the format of \\192.168.1.xxx, click OK. If you don’t know the Mac IP, check out this guide to find IP address on Mac. In the authentication dialogue to pop up, enter the shared Mac users login and password and click OK. You can then access Mac public folder and user files just like you access any other folders within Windows. You can also use your Mac hostname instead of the IP address.
Method 2. Connect Mac SMB Share from Windows Explorer
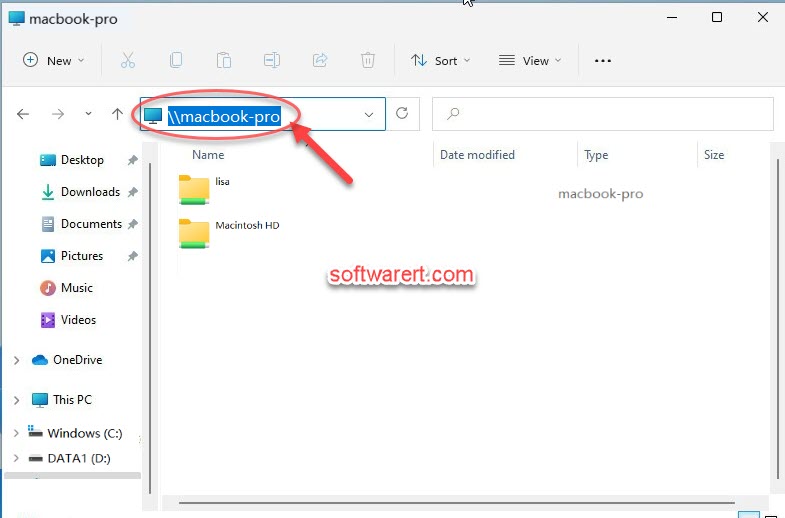
On your Windows 11 or 10 computer, simply open the Windows explorer or file manager and in the address bar) and type \\mac-hostname or \\mac-ip. Press Enter to access. Then log in with the administrator account to access your entire Mac from Windows computer.
Can’t connect Mac SMB share from PC?
- Make sure to connect both PC and Mac to the same Wi-Fi network.
- Disable any VPN or proxy you are using.
- Pay attention to the backward slashes and the Mac hostname. Your PC won’t be able to access Mac file sharing if the server address is incorrect.