You can create an animated GIF file from still images, photos. In this article, we will walk you through the basic steps to bring your pictures, photos to life with Photoshop on a Windows computer.
Step 1. Prepare source image files
First of all, put all the source images into a folder and sequenced them properly on your PC.
Step 2. Import photos to Photoshop
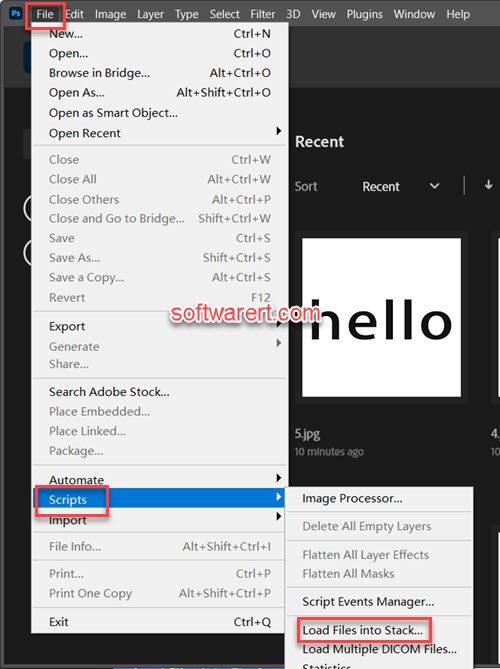
Run Photoshop, the program we will use as the GIF maker, on your computer. Click File > Scripts > Load Files into Stack.
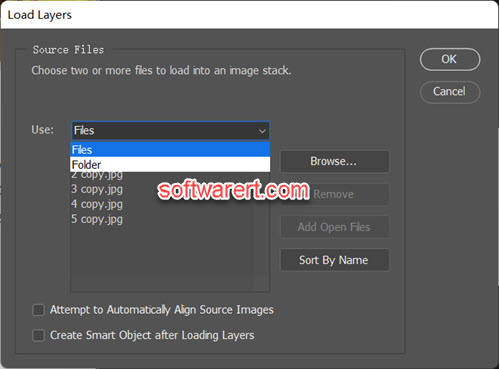
The Load Layers dialog pops up. Click Browse to find and select the photos you want to include in the GIF file. Click Open > OK to import the selected photos into a single layered file. You can also click the drop-down menu next to Use and select Folder, and click Browse to find the folder where all those source images are save and load all of them to the file list. Finally click OK to import them into Photoshop.
Step 3. Open the Timeline
The Timeline window is hidden by default. To enable it, go to Window > Timeline. You can then find the Timeline panel at the bottom of your workspace.
Step 4. Create Frame Animation
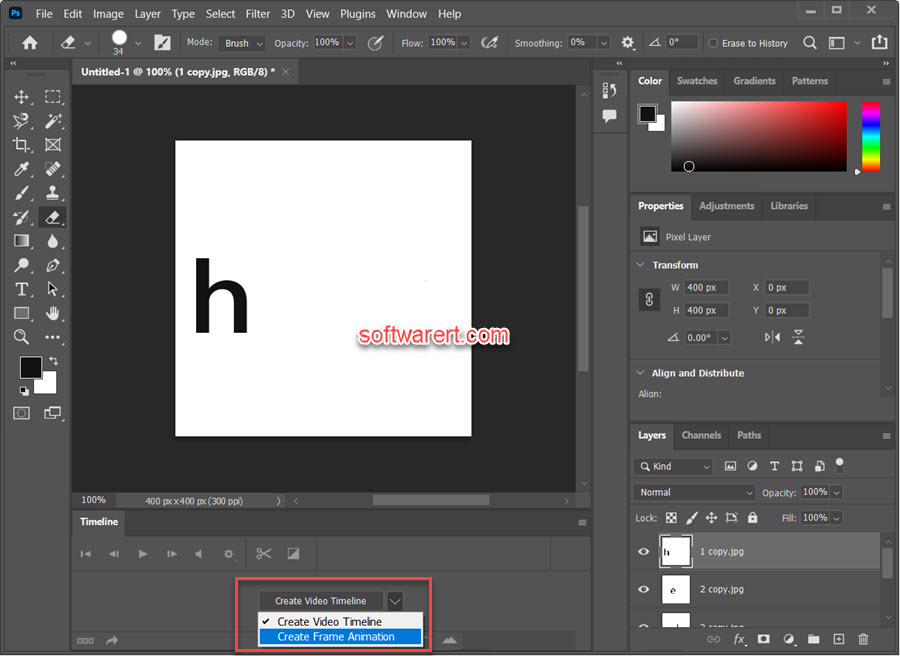
Click Create Frame Animation button in the middle of the Timeline panel to create a new frame animation. If you can’t see the Create Frame Animation button, you should see the Create Video Timeline button instead. In this case, click the down arrow icon to expand the list and select Create Frame Animation. Then click the button to create a new frame animation.
Step 5. Convert image layers into animation frames
Click the menu icon from the upper right corner of the Timeline panel and choose Make Frames From Layers from the menu list to convert all the layers in the Layers panel into individual frames in the Timeline.

Step 6. Sequence image frames properly
Preview the animation to make sure all frames are in right order by either pressing Play on the Timeline or using the space bar on your computer keyboard.
If your animation is playing in reverse, click the Timeline menu icon again and select Reverse Frames.
If necessary, drag and drop the thumbnails of the image frames individually in the Timeline to sequence them properly.
Step 7. Set frame duration
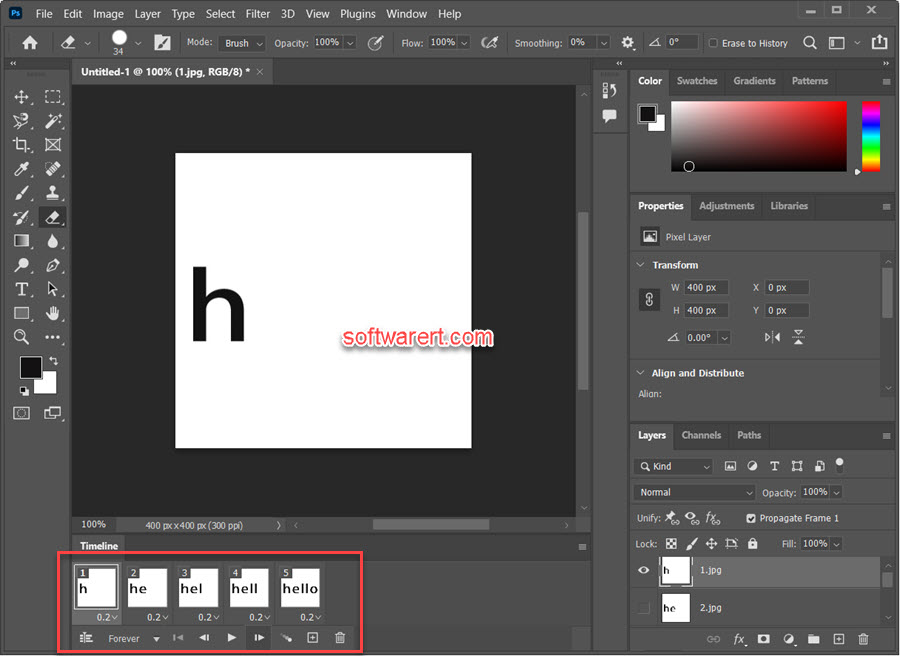
You can click the time for each frame and choose the duration individually. Or you can opt to give each frame the same timing, Click on the first frame in the Timeline, then click the last frame while holding the shift key to select multiple or all image frames. Click on the down arrow or frame delay time in one frame to expand the list of various delay or duration options, choose the duration you prefer and this will update all the selected frames.
Step 8. Set the animation loop
By default the looping option for the GIF animation will be set to Forever below the Timeline so the animation will loop continuously. If need, you can also choose “Once“, “3 times” or other repetitions with a specific number accordingly from the drop-down menu.
Step 9. Export to GIF
Choose File > Export > Save for Web (Legacy). Set GIF as the export format if it is not selected by default. Tweak other settings as you wish. Finally click Save button, choose a file name and location to export the GIF file to your computer.
Now go to share the animated GIF on your favorite social platform or with friends.