Sometimes, you may need to exchange files between VirtualBox VM and host system. There are different ways to achieve that. For example, you can upload the files from the guest or host OS to a cloud service, then download them to the other OS; you can also use USB drive to transfer files between host OS and guest OS. However if you need to transfer files frequently between the host computer and virtual machine, a shared folder is the best choice. Sharing folders between VirtualBox hosts and guests isn’t nearly as hard as you think. It is easy to setup, even a non-techie can easily setup a shared folder using VirtualBox. Meanwhile it serves as a way to expand the available storage for your virtual machines as you don’t need to store the various copies of the same files on different virtual machines. You just need to save the files to the shared folder on the host computer, then access them from any virtual machines created with VirtualBox.
In this article, I will show you how to create a VirtualBox shared folder on Mac, the host, and access the shared folder from a Windows virtual machine, the guest OS.
Create a shared folder in VirtualBox on Mac
Launch the VirtualBox program on your Mac.
Once the Oracle VM VirtualBox Manager opens, click your OS on the left panel and click on Settings from the top menu bar. The Settings opens in a new window with the General tab opens automatically. Switch to the Shared Folders tab.
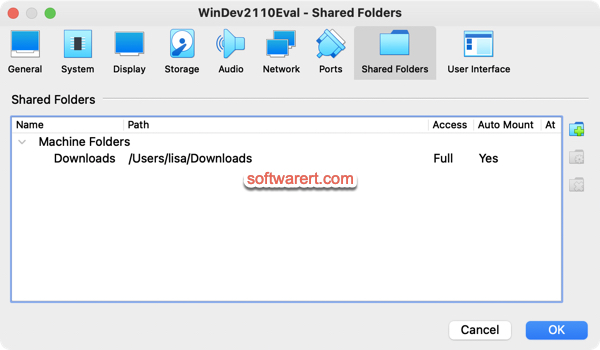
All your shared folders if any will be displayed here. Click Add icon (folder with the plus) in the right section. A pop-up shows up.
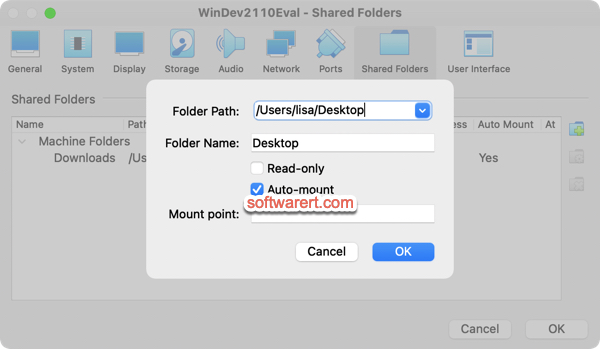
Browse to a folder of your choice in the folder path. Optionally change or enter a different folder name if you like. You will see two options below the folder name:
- Read-only: When checked, the guest OS will not be able to write to the specified shared folder. By default, the shared folders are given the full access rights, including writing and modifying of the content, but by setting the Read Only checkbox you can restrict the rights of the user, in such a way limiting his possibilities to the allowed level.
- Auto-mount: When checked, the guest OS will try to automatically mount the shared folder on startup.
Click on OK to add a shared folder in VirtualBox.
Access VirtualBox shared folder from Windows guest OS
Since we have enabled the Auto-Mount during the setup of the shared folder in VirtualBox, this shared folder will be automatically mounted when you start the virtual machine, the Windows OS, in this example.
Open the Windows File Explorer on your Windows computer, click Network from the left panel to access VirtualBox shared folder.