Do you have trouble change file extensions on Windows computer? In an earlier post, we discussed how to convert voice recording files recorded on a Samsung Galaxy phone from 3GA to MP3 format, several readers wrote to us saying “how can you rename a file (the extension) because I can’t see file extensions, I can only rename the ‘normal’ name.” It is true with most Android phones, you can only rename file on mobile but can’t edit file extensions unless you have installed the file explorer. Today, we will be using Windows PC in the demo to show you how to display file extensions and change file extension in Windows 10 and Windows 11. File extensions of known file types are hidden on Windows 10, 11 PC by default. Only those file types that are not associated with some software installed in your computer display file extensions after file names. This seems to be easier to use for average users. However this could be confusing as well. Many Windows users are confused as file extensions can be found in some files not another. In this guide, we will show you quick ways to turn off “Hide extensions for known file types” feature of File Explorer in Windows 10, Windows 11 so you will not see some files have extensions, other files do not and this allows you to change file extensions in Windows OS.
Part 1. Why Windows not display file extensions?
Before we go to show and change file extensions, we should be aware of the downsides of doing so. The primary reason for hiding file name extensions is to make the operating system more user-friendly. However it can also help prevent users from inadvertently changing the extension or renaming a file incorrectly. Displaying file extensions can make it easier for malicious software to trick users into opening harmful files, such as those suspicious .exe files.
Part 2. How to show file extensions and change file extensions in Windows 10?
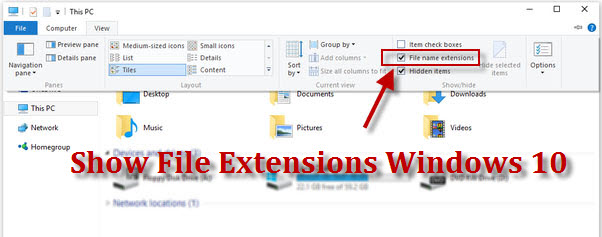
In order to edit file extensions in Windows 10, you need to change the File Explorer settings to display file extensions first. Open File Explorer in Windows 10 or any folder on your computer hard drive, then switch to the View tab in upper menu to view ribbon menu. Click to check the box before File name extensions option to enable file extension display in Windows 10. Now you can see those hidden file extensions in Windows explorer, including those common file types and file extensions like .exe, .doc, .docx, .xlsx, .jpg, .png, .mp3, mp4, .wmv, etc.
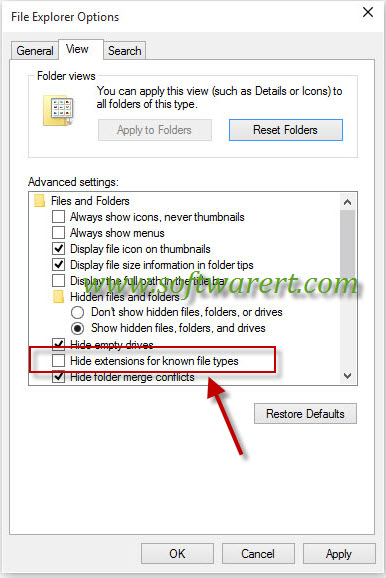
To show file extensions in Windows 10, you can also click the Options button as shown in the upper right corner, then disable the “Hide extensions for known file types” in windows 10 from File Explorer Options as shown below.
Now you can go to change a file name extension within Windows File Explorer. Simply double click a file name then edit file extensions as you like on Windows 10 PC. Alternatively you can right click on the file you like to edit, then choose Rename from the context menu on right click to start changing file extension for the selected file in Windows 10.
Part 3. Show file name extension in Windows 11
There are various methods to show file extensions in Windows 11. To display file name extension in Window 11, you can follow below instructions.
Method 1. View file name extension in Windows 11
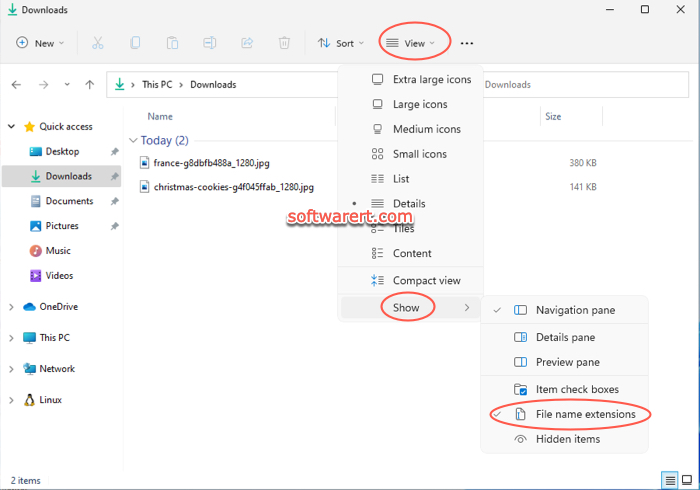
Open File Explorer in Windows 11 operating system, click View from the top menu bar to expand the drop-down menu and select Show from there. You will then see the sub-menu, choose File name extensions from this list.
Method 2. Display file name extensions from Folder Options
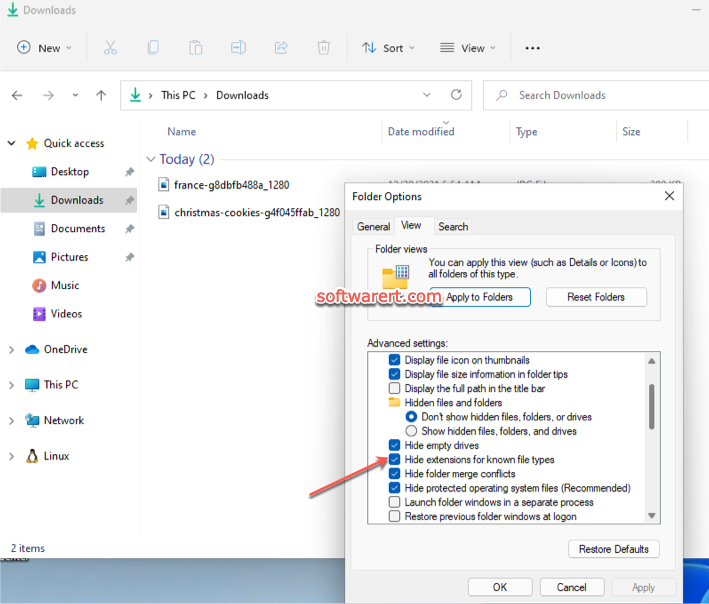
Also in File Explorer, click the See More (…) button to display the drop-down menu and choose Options from there. The Folder Options opens in a new window. Switch from the General tab to the View tab. Find and disable the Hide extensions for known file types option, click Apply button to save the change.
Part 4. Batch change file extensions in Windows 10, Windows 11
Have you ever wanted to change a group of files file extensions in Windows 10 or Windows 11? For example, you want to change 100 audio files with .amr extension to .mp3. You do not have to change file extensions one by one. You can make use of the Windows Command Prompt to batch change file extensions on a PC which is running on Windows 10 or 11.
Firstly create a new folder on your computer. For example, we can create a folder named ‘test’ on hard drive D. Put all those .amr files to this new folder. Then open the Command Prompt in Windows 10 or 11. You can right click on the Windows logo at the bottom-left corner of the screen, then choose Command Prompt to open Command Prompt in Windows system or simply type CMD in the search box at the bottom-left corner to find and open Command Prompt in the Windows OS.
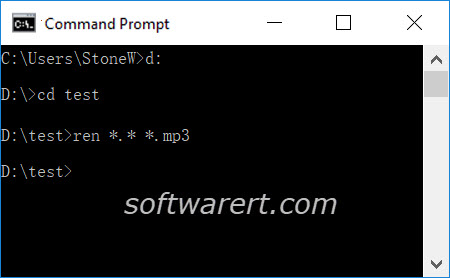
Secondly we need to change path to the created folder in Command Prompt. By default it opens the user folder. Type “d:” without the quotes and press Enter to change to another disk. Type “cd test” and hit Enter to change the current working directory to the “test” folder where all the files you want to change file extensions are saved.
Finally type “ren *.* *.xxx” and hit Enter to change all files’ extension to .xxx. For example, if you want to change them to mp3 files, use the command “ren *.* *.mp3”.
Thank you!
you are welcome. thanks for stopping by.
how do you change the file type for example .ive – .MOV
do you want to convert video file format? If so, you need to use a media or video editor, such as Handbrake, VLC player, etc.