Mac OS has the built-in tool to help us take screenshots of the Mac screen. Basically you only need to press a combination of keys on your Mac keyboard to capture the screenshot. For example, you can press Command + Shift + 3 to takes a screenshot of the entire screen; press Command + Shift + 4 to brings up a selection box, then draw a region of the screen to capture; press Command + Shift + 4, then hit Spacebar, click on a window to snap. It however can’t help us capture scrolling window or pages. In this article, we will use a free third-party screenshot app, iShot for Mac, to take scrolling screenshots and capture long web pages on Mac.
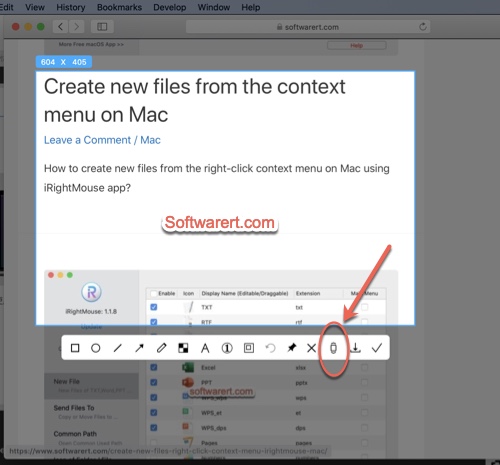
Download the free screenshot app from previous linked page first if not yet. Open it from the launchpad on Mac, you will see its icon at the top menu bar. Open the webpage or window that you want to capture. If it is a very long page, wait a second for it to be loaded completely. Press Option + A keys on your keyboard, or click the iShot icon at the top menu bar, then choose Screenshot from the drop-down menu. Your mouse cursor turns to a cross, drag and drop it to select the area of the screen, window or web page you like to capture. Make sure all selected content or part can be scrolled, otherwise you won’t be able to scroll or take scrolling screenshots. There will be the toolbar below your selected area. Click the Scroll Screenshot icon from this toolbar.
Swipe with two fingers on the trackpad to scroll the page or window, the screenshot can be previewed at the right side in real time.
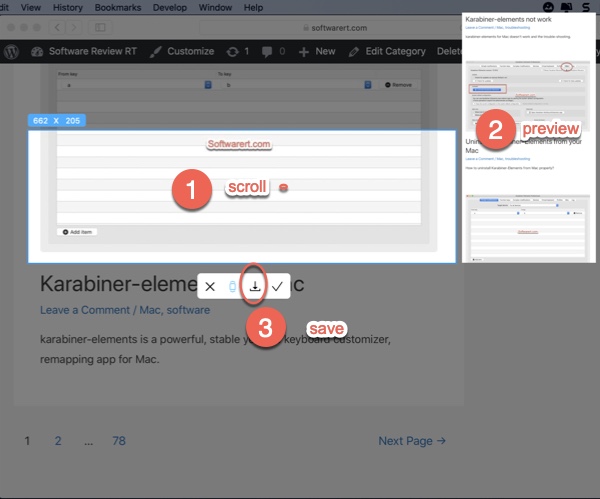
When you have scrolled to the very bottom of the portion you like to capture, click the Save button to save the long screenshot to your Mac.
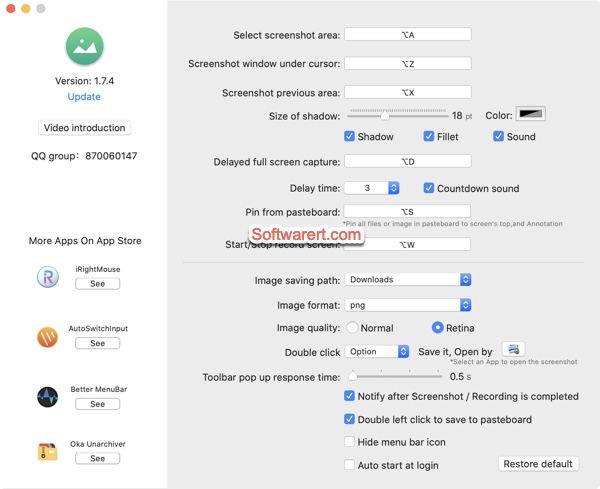
By default, iShot saves all screenshots in PNG format to the Downloads folder in Finder. You can find all screenshots there. You can also open its Preferences to customize the saving path, format, quality and other aspects of the screenshot app.