Windows Photos app is not only an image viewer and editor, but also includes the ability to open, play, even edit videos. For example, the Windows Photos app lets you do a quick trim to make the large or long video file smaller in a fast way. You don’t have to rely upon a third-party video tool, as the Photos app does the task perfectly. In this article, I will show you how to quickly trim a video in this Photos app (version 2022.31070.26005.0, could be the latest as of Sep 2022) on a PC which is running on the latest Windows 11.
Trim a video in Windows Photos app
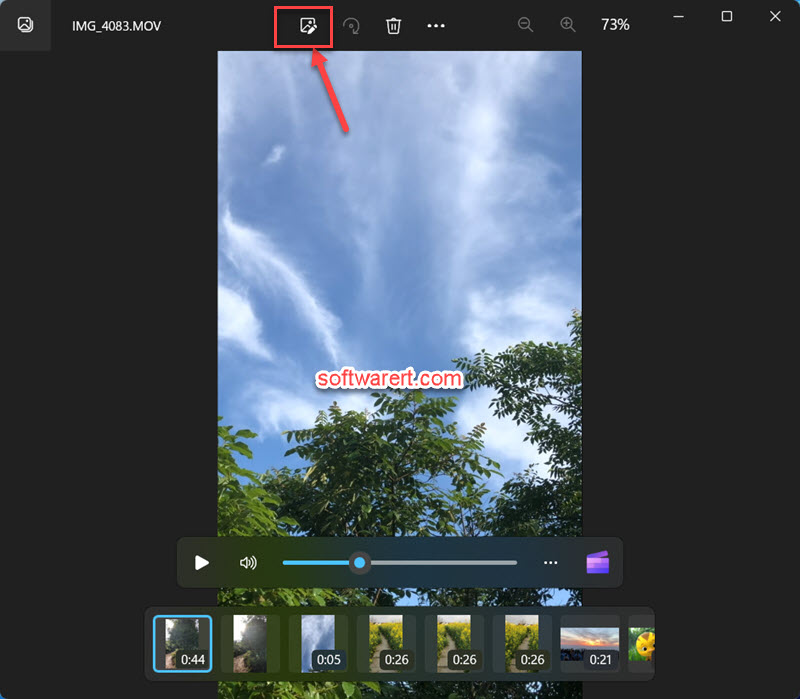
Open Windows File Explorer, browse to the folder where the video you like to edit is saved. Right click on the video and choose Open with > Photos. The video will open in the Photos app and start playing automatically. Go to the toolbar at the top and click the Video trim button which can be found at the beginning of this toolbar. Alternatively press the keyboard shortcut Ctrl + E to quickly open the built-in trimming tool.
Here you will see two buttons in the upper right corner: Save a copy, Cancel. At the bottom, you should see two markers, sliders or pointers or whatever name you call it, which you can drag to choose the start and end points of the video, and the play head which shows the current viewpoint, the current frame or image you are viewing, in the preview window.
Drag or move the blue markers on the timeline to choose start or end points or create trim points. Click Save a copy, then those unselected areas or parts will be removed. Only the part between the left pointer/marker and the right pointer/marker will be saved in the new video file.
Can’t trim a video using Photos app?
If you found the Save a copy button is greyed out, most likely you have not created the trim points in the timeline. Move the left and/or the right slider in the Timeline before you trim a video in Windows Photos app.
Where to find those videos trimmed by Photos app?
By default, the Windows Photos app store images and videos in the Photos folder. There will be a sub-folder for video projects. On my Windows 11 computer, the trimmed videos are saved to C:\Users\matt\Pictures\Video Projects.
Video, audio formats/codec before/after the trimming
They are all MP4 files with video codec: H264 – MPEG-4 AVC (part 10) (avc1) and audio codec: MPEG AAC Audio (mp4a). The original videos are captured using my iPhone under the High Efficiency mode and saved as MOV files with video codec: MPEG-H Part2/HEVC (H.265) (hvc1)
Other possible problems that may be encountered in video trimming
- Many other video formats and codecs are not supported. For example, you can’t edit videos in AVI, FLV, RMVB, MXF, etc.
- You can not cut off a part from the middle. It only allows removing parts from beginning and ending.
- You can not use it to trim video without re-encoding. The quality of the original video may suffer.
- It only export new videos in MP4 format.
- It may change the video aspect ratio. We have this issue when trimming some portrait oriented videos. It saves the new video as landscape video.
Other video trimming solutions for Windows users
You can use Handbrake, a free, cross-platform video transcoder program, to easily trim and compress your videos on PC or Mac. Check out these steps to trim videos using Handbrake.