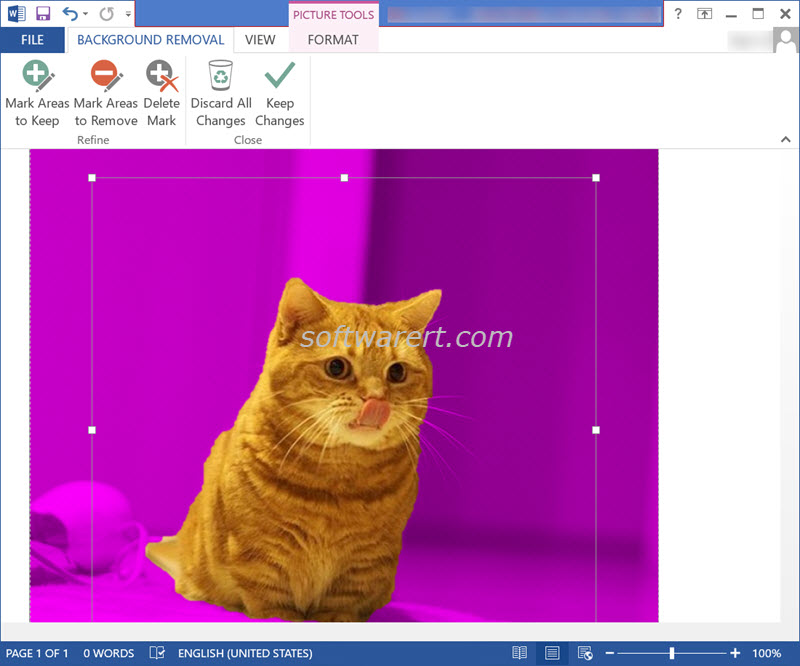
Want to merge photos, remove picture background, replace image background or make the background transparent? There are many image editors you may choose to remove the background from an image. Check out this guide to change the background of a picture. Surprisingly the most well-known word processing program, Microsoft Word, can also help us with that. Word has included some very advanced tools that you might not even think were possible. The built-in image background removal tool is one of them. In this quick guide, we will show you how to remove photo background in Windows 10 using only Microsoft Word.
Run Word on your Windows PC, create a black document in Word. Switch from Home to the Insert tab. Click Pictures to select a photo from your PC and insert it to the Word document. After that you will notice the Format tab appears on the Ribbon. Click Remove Background at the upper left corner. After that you will find Word program will automatically highlight the background of your picture in magenta. If Word managed to pick out the image background correctly, you can simply press Enter on your keyboard to remove background from the image or click the Keep Changes button to get the background free image. If Word failed to mark the picture background accurately, use the Mark Areas to Keep and Mark Areas to Remove tools in the Background Removal tab to refine the selection.

Finally right-click the image and click Save as Picture to save your background free image as a separate file.Note that if you want to remove white background from image or erase any background color, you should save the photo in PNG format so as to keep the background transparent.
