Saved some WebP image on Mac and can’t find a WebP viewer to open or view it? Need to edit a WebP with a image editor or need to convert it to JPG, PNG or other file format on Mac? All you need is just XnConvert, a free image editor and converter for Mac.
About XnConvert
XnConvert is a batch image converter and resizer with a powerful and ease of use experience. All common picture and graphics formats are supported (i.e. JPG, PNG, TIFF, GIF, Camera RAW, JPEG2000, WebP, OpenEXR) as well as supporting over 500 other image formats. Also available within the batch operations include rotating, adding of watermarks, adding of text along with many image-adjustment features such as brightness, shadows and more. You can find more information or download it for free from this page.
In this quick guide, we will show you how to open, view webp images and convert webp to JPG, PNG or other file formats on Mac.
View or convert WebP to PNG, JPG on Mac
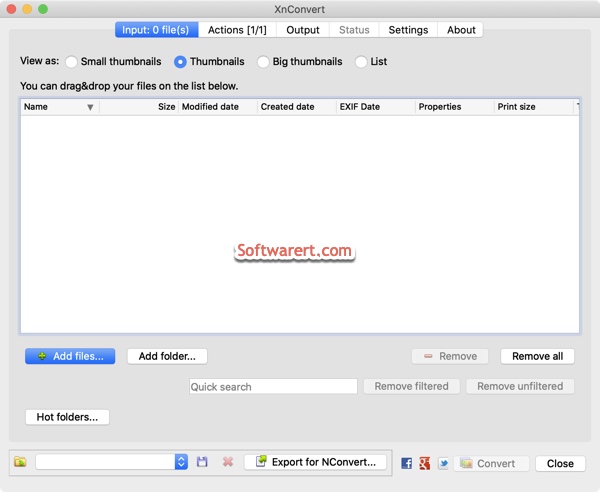
Run the image editor from the Launchpad on your Mac. Its Input screen opens automatically. Find the .webp image files in Finder. Drag and drop them to the editor to open them with the program. You can then view the webp images as thumbnails.
Switch from the Input to the Output tab of XnConvert. Here you can specify various output settings. Choose the output file format, JPG, BMP, PNG or any other you need. If you want to open webp images using Preview on Mac, you can convert webp to jpg, png.
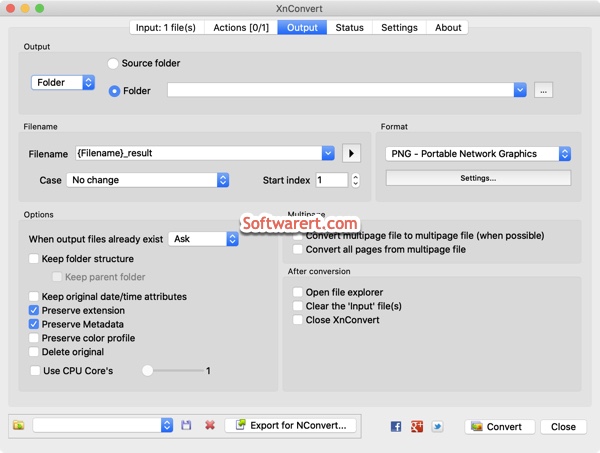
In this demo, we will select PNG as the output format and ignore other settings. As we have already mentioned this is a multi-functional image processor. We can use it to convert pictures, resize photos, add watermarks, add text, and so on.
Hit the Convert button at the bottom right corner and wait a while for the image converter to convert webp images to JPG, PNG or other specified file format. Its Status tab opens at the same time showing you the results and errors if any.
By default, the converted images will be saved to the same folder as the source image file. Find this converted image in the output folder in Finder, then open and view it with your favorite image viewer or edit it with your image editor on Mac.